
Remove Any Garage Flooring Stain With These Cleaning Tips
I spend a lot of time in my garage. It’s part workshop, part hangout zone, part tool “museum”—and I love it that way. But there’s one thing that used to drive me absolutely nuts: the stains on my garage flooring. Oil drips, old paint spills, mystery marks from who-knows-when. They’d pile up little by little until the whole space felt grimy.
It wasn’t just a cosmetic thing either. Greasy spots are slippery, and dust traps in cracks. And honestly, nothing kills a productive Saturday project vibe faster than staring down a stained, chipped garage floor. That’s when I finally decided to get serious about cleaning (and I even upgraded my space with Swisstrax flooring to make cleanup easier). Here’s what you need to know:
- Understanding garage flooring materials
- Oil and grease
- Rust
- Paint or chemical spills
- Tire marks
- Mold and mildew
- Hairline cracks
- Pitting or minor chips
- Peeling coatings (epoxy or paint)
- Pro tips for preventing future stains and damage
Whether you’ve got raw concrete or a finished epoxy floor, here’s everything I’ve learned about keeping garage flooring clean, safe, and (most importantly) easy to maintain.
Understanding Garage Flooring Materials
Not all garage floors are created equal—and trust me, that matters when you’re cleaning them. Before you grab a scrub brush or cleaner, know what you’re working with:
- Concrete:
Most common and most stain-prone. It absorbs liquids easily.
- Epoxy Coating:
This option is
great for resisting spills but prone to peeling if not applied right.
- Polyurea Coating:
Tougher and more flexible than epoxy; resistant to scratches and UV.
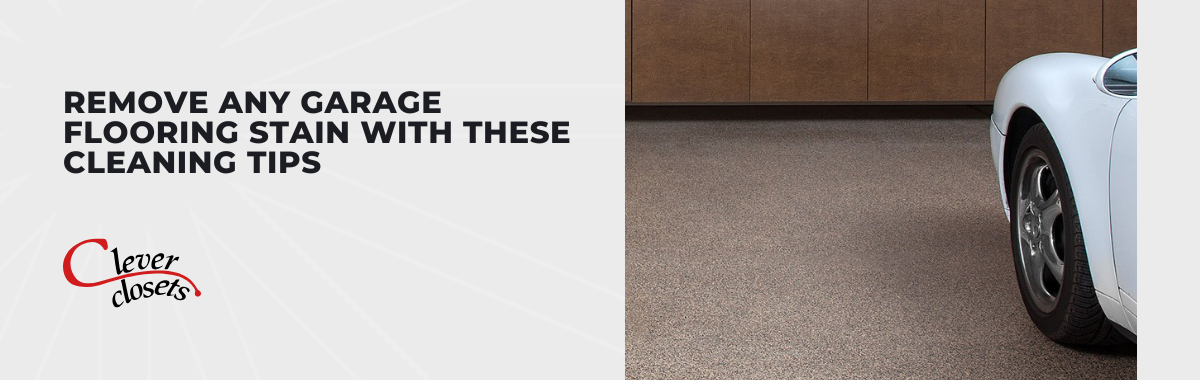
- Swisstrax Flooring: Modular interlocking tiles that sit above the floor. Ultra-durable and super easy to clean.
- Garage Floor Tiles: Usually rubber or PVC. Comfortable underfoot, but can trap grime between seams.
The right cleaning approach depends on the material. For example, epoxy needs gentler care than raw concrete. And with Swisstrax? Most of the gunk never even reaches the floor—huge time-saver.
Oil and Grease
These were my arch nemesis for years. Until I found a method that actually works.
- Blot With Paper Towels: Don’t smear—dab to absorb as much as you can.
- Sprinkle Baking Soda or Cat Litter: Let it sit for a few hours to soak up the residue.
- Apply Degreaser and Scrub Thoroughly: Use a stiff brush and give it some elbow grease.
- Rinse and Repeat: It might take a few rounds to fully clean up grease spots, especially older ones.
Rust
If you’ve got metal shelves or tools, rust stains are inevitable. They look worse than they are.
- Use a Vinegar or Lemon Juice + Baking Soda Mix: This combination is natural and surprisingly effective.
- Let It Sit: Let the mixture work itself in for 15 minutes, then scrub and rinse. This gives the acid time to break things down.
- Repeat for Stubborn Spots: Some rust spots may need a second round to fully disappear.
Paint or Chemical Spills
These messes are tricky—especially if the spill dried before you noticed it (don’t ask how I know).
- For Fresh Spills: Speed matters here, so absorb any spills and wipe them up right away.
- For Dried Paint: You’ll need a solvent or paint stripper—and a respiratory mask. Make sure it’s compatible with your flooring type.
Scrape gently with a putty knife—there’s no need to gouge the floor. Then, rinse the area well: Especially important with strong chemicals.
Tire Marks
Tire scuffs are surprisingly stubborn—and super annoying if you care about a clean floor like I do.
- Use Citrus-Based Cleaner or Degreaser: It quickly cuts through the rubber residue.
- Scrub With a Stiff Brush: Pressure is key—use your strength to scrub away those tire marks.
- Rinse Thoroughly to Avoid Residue: If you skip this step, the spots you cleaned will attract more dirt next time you park.
- Repeat Monthly if Needed: I’m always making “hot tire” marks in my car, so I clean them up about once a month—and sometimes even more often in the summer months.
Mold and Mildew
Moisture-prone garages (hello, springtime) are mold magnets. Here’s my go-to method:
- Spray With Diluted Bleach or Mold Cleaner: I use a 10:1 ratio for safety.
- Let It Sit, Then Use a Brush to Scrub: Don’t skimp on the elbow grease here—get into those corners.
- Rinse and Dry Completely: A fan helps speed up the drying process.
Hairline Cracks
Little cracks can turn into big problems if you ignore them. I learned that the hard way.
- Clean the Area: Get rid of dust, loose bits, and grease.
- Fill With Concrete or Patch Filler: Smooth with a putty knife and let it fully cure if you want to quickly fill small concrete cracks.
Pitting or Minor Chips
These are mostly cosmetic, but they drive me nuts if left untouched.
- Sweep Clean and Remove Debris: A good wire brush works wonders for getting a concrete floor truly clean.
- Use Patching Compound: Apply evenly and let it dry fully.
- Sand Down: You definitely want a level surface when you’re done, and light sanding keeps it looking polished, too.
Peeling Coatings (Epoxy or Paint)
This is one reason I eventually ditched DIY epoxy and relied on the pros. For something as pivotal as an epoxy garage floor coating, expert application is well worth it. Here’s a breakdown of the typical process:
- Strip Damaged Area: The pros take the time to do this right, so your new floor coating will completely resist peeling.
- Recoat According to Manufacturer’s Instructions: Prep is everything here—and the pros do it right.
- Consider Full Reapplication: If your entire floor is in rough shape, invest in a full epoxy coating reapplication. Then, layer Swisstrax on top for a worry-free garage floor.
Pro Tips for Preventing Future Stains and Damage
The best cleaning trick? Avoiding the mess in the first place. Here’s what I’ve learned:
- Apply a Durable Coating (Like Epoxy or Polyurea): Protects against everything from oil to UV rays.
- Use Protective Mats:
I use mats under vehicles or tools, especially if I’m doing oil changes or projects.
- Clean Spills Quickly: Obvious, but easy to forget—remember to wipe up spills quickly to avoid damaging your coated floors.
- Create a Cleaning Schedule: I tackle my garage cleaning duties on the first weekend of every month—and it takes just 15 minutes.
- Upgrade to Swisstrax Flooring: No lie, this was a game-changer. Stains don’t stand a chance because most stuff never even touches the floor beneath.
Conclusion
Garage flooring doesn’t have to be a constant battle. Whether you’re fighting back against stubborn stains or just tired of seeing oil spots spread, the right cleaning routine makes all the difference. What I think you’ll find is that staying consistent—and investing in a flooring system—makes everything easier to maintain. These days, my garage feels more like a workspace I’m proud of, not a mess I’m dodging. Want to make cleanup a breeze? Start with the floor beneath your feet.
Clever Closets Inc.
Fenton, MI
Monday - Friday: 8am - 5pm
Saturday - Sunday: Closed